Quest Explained Wiki

Characters

Everyone who matters in the Limsa Lominsa story, the ones you meet most first. Open a character to follow them quest by quest.

Baderon

In 20 quests, first met in Coming to Limsa Lominsa

Baderon owns the Drowning Wench, a pub in Limsa Lominsa. Ryssfloh says he curses like a sailor but is kind to newcomers.
What Baderon does in each quest
  1. Coming to Limsa Lominsa: Baderon registers you at the Adventurers' Guild. He says the Calamity, a disaster, blurred everyone's memories, even of the heroes called Warriors of Light. He shields you from a suspicious Yellowjacket. He is the only son of Lodewicus, the guild's founder, and left home young.
  2. Close to Home: Baderon sends you to touch the aetheryte, a travel crystal, to see Swozblaet with an old octant, and to visit the Arcanists' Guild. He blames the Calamity, or the ale, for his poor memory. He urges you to help people in need.
  3. Glory Days: Baderon laughs at the gift: he has hated aurelia umbrellas since his days as a sellsword, a fighter for hire, when even salt and a campfire did not help. Few sellswords keep all their fingers, so he earned the respected nickname "Tenfingers".
  4. The Rats in the Wharf: Baderon pays you from a huge sack left by a stranger, who said the rats' scurrying noise was driving him mad. Baderon thinks the man was already a bit unwell in the head and doubts he can ever find peace.
  5. On to Summerford: Staelwyrn, the farm's owner, is Baderon's old mate. He runs it with mostly reformed pirates, trying to bring life back to soil the Calamity ruined. Baderon gave you a glowing recommendation and tells you to work hard and impress 'the old bastard'.
  6. Fool Me Once: Ancreta says the Yellowjackets hire adventurers only through the Adventurers' Guild. The panel notes add that this means Baderon: official work for adventurers in Limsa goes through him.
  7. Bait and Swat: Baderon calls the pact a farce that only bought Limsa time. He is sure the kobolds hoard crystals to summon their god, Titan. With no Company of Heroes to save them this time, he offers to ask the Yellowjackets to guard the Stead.
  8. A Pound of Cure: Baderon has an Eorzean version of this quest's proverb about prevention and cure, using 'onze' and 'ponze', Eorzea's words for ounce and pound.
  9. Just Deserts: Baderon promises fair treatment for Sevrin; a Yellowjacket who hands out punishments is his friend. He gives you free room and board at the Wench and signs you up for leves (paid odd jobs) with T'mokkri. He suspects some pirates of the kidnappings.
  10. Sky-high: Baderon points you to the Skylift in middle La Noscea, a big scaffold on the cliff called the Descent, used to haul cargo. He hears the workers need help with odd jobs, and sends you to its head, Wyrkrhit.
  11. Men of the Blue Tattoos: Ahtbyrm told Baderon the whole tale, and he thanks you. He jokes that the only man who can read the script is Baderon himself. He calls you one of his regulars and trusts you. What he reads tells him trouble is brewing.
  12. Feint and Strike: Baderon was once a sellsword, a fighter for hire, and learned to read the script of the Sahagin, the "fishbacks," from orders taken off dead foes. He sees the Victory attack was a decoy, guesses Swiftperch is the real target, and sends you to Reyner.
  13. High Society: Baderon nearly snorts ale at the news of your rise. He says the Bismarck, a fine restaurant, caters the banquet, and sends you to J'nasshym for clothes. The box holds dress shoes: a gift from him and everyone you have helped.
  14. A Mizzenmast Repast: Baderon tells you to wear the shoes and hold your head high. He described you to Zanthael only by your shoes. When you collapse at the banquet, he drags you back to the Wench, blames too much cake, and says the Admiral wants a word.
  15. The Lominsan Envoy: Baderon is stunned and proud that you are the Admiral's personal envoy. He describes the grim forest folk of Gridania and the crafty merchants of Ul'dah, warns of intrigue, beastmen and their primals, and wishes you good fortune as you board the airship.
  16. Call of the Sea: Baderon greets you loudly by name, pleased the adventurer is you. He confirms the job but warns it is dangerous and not for the faint of heart. If you still want it, he offers to explain the details.
  17. Rising to the Challenge: I'tolwann mentions him: the last time she gave a customer a free drink, Baderon docked her wages.
  18. It's Probably Pirates: He says people are jumpy since the Sahagin's pirate allies paid a visit. He teases Commodore Reyner. When you report the Sahagin hideout, he is shocked, thanks you on behalf of Limsa, and offers a new job from the sister guild in Gridania.
  19. Call of the Forest: He admits he knows nothing more about the task, but trusts you after the chaos in Sastasha. He sends you to Mother Miounne, his counterpart in Gridania. Miounne calls him a "foul-mouthed rogue."
  20. Fire in the Gloom: Miounne says Baderon praised you so highly that she had little doubt about your skills.
Staelwyrn

In 9 quests, first met in On to Summerford

Staelwyrn owns Summerford Farms, an orchard outside Limsa Lominsa. He has asked his old mate Baderon for an extra pair of hands.

What Staelwyrn does in each quest
  1. On to Summerford: Staelwyrn introduces himself as the 'old bastard'. Many workers are his old pirate crew; the Calamity wrecked their ship and badly hurt him. He took Admiral Merlwyb's farming offer, but his men never took to the soil. His name means 'Still Snake'.
  2. Kobolds Ahoy: Staelwyrn praises Ostfyr's caution, but says the Sahagin swarming at his gates need his attention first. Still, he respects the Yellowjackets too much to ignore their warning, and takes it to heart.
  3. Dressed to Call: Staelwyrn warns the ex-pirates here are still rogues who respect strength. Once your gear passes, he has work for you. In small talk, he says he captained a pirate ship until the Calamity (a great disaster), then dragged his unwilling crew here.
  4. Lurkers in the Grotto: Staelwyrn worries his ex-pirate farmhands may be tempted back to piracy. He agrees the knife points to pirates. He vouches for Y'shtola, who often studies aether (magic energy) near Summerford. He thanks you. His name means 'Still Snake' in old Roegadyn.
  5. Washed Up: Staelwyrn asks you to round up his slacking farmhands instead of doing their work, so they learn. All return except Sevrin, who has slipped away from him countless times. He does not blame you and vows to put Sevrin in the dirt.
  6. Double Dealing: Staelwyrn has long known Sevrin makes shady deals with goblins behind his back. He gets his full payment through you and admits he had hoped for more from Sevrin. He could overlook skimming, but not selling everyone out to goblins. He warns you about Sevrin.
  7. A Pound of Cure: A chart note says Tiller's Rest lies away from the orchards and from Staelwyrn, so his ex-pirate farmers like to go there to avoid work.
  8. Plowshares to Swords: Staelwyrn is glad Pfrewahl did not fight, since he wants no blood on his crops. When you tell him Sevrin met the pirates, he swears Sevrin's treachery must be punished.
  9. Just Deserts: Staelwyrn cannot cut Sevrin loose; the young man reminds him of his younger self. He praises Sevrin's choice to save his mates, keeps a place for him at the farm, and thanks you. He asks you to tell Baderon, whom the Yellowjackets heed.

Ahtbyrm

In 9 quests, first met in On to the Drydocks

Ahtbyrm is the head shipwright at the Moraby Drydocks. He is waiting for materials he ordered over a month ago.

What Ahtbyrm does in each quest
  1. On to the Drydocks: Ahtbyrm is angry at another delay, then says sorry to you, the messenger. He leads work on the Victory, the first new warship since the Calamity, the disaster that sank most of their ships. To him it is a symbol of Limsa Lominsa's rebirth.
  2. Without a Doubt: Fyrilsmyd was never late in twelve months. Ahtbyrm doubts Haldbroda at Candlekeep Quay, who claims he never saw Fyrilsmyd. Ahtbyrm cannot leave his post, so he sends you to threaten Haldbroda with a move to lonely Turtleback Island.
  3. Failure to Lunch: Ahtbyrm does not speak here. Wafufu mentions him as the hungry foreman whose belly keeps grumbling and who gives her "the evil eye". She fears he might eat her if the lunches stay lost.
  4. Nailed It: Ahtbyrm does not speak here. Hezzkhezl mentions him as the clever foreman who thought of heating rivets with sprite cores, and says that is likely why he became chief so fast. Ahtbyrm's name means "Eight Tree" in old Roegadyn.
  5. Righting the Shipwright: Ahtbyrm is relieved that Fyrilsmyd and the supplies are safe, and says it was foolish to think he would blame him. The sea was calm that day, so he suspects the waves were made by Sahagin magic, not a natural storm.
  6. Do Angry Pirates Dream: Ahtbyrm admits he doubted you at first. He still does not like you, but he trusts you, and recommends you to Ghimthota. It sickens him that some would betray Limsa Lominsa for a few coins after all it has suffered.
  7. Victory in Peril: The pirate leader Ahtzapfyn is Ahtbyrm's father. Ahtbyrm gave up pirate life to become a shipwright, and his father attacks the Victory to "knock some sense" into him. Ahtbyrm says the pirates' glory days are over. Shaken, he thanks you and sends Ghimthota his apologies.
  8. Men of the Blue Tattoos: Baderon says Ahtbyrm told him the whole tale and was still reeling from his old man's part in the business.
  9. Feint and Strike: Baderon mentions him only through his father: the tattoo-faced Serpent Reavers were said to be paying "Ahtbyrm's old man."

Thubyrgeim

In 8 quests, first met in Way of the Arcanist

Thubyrgeim is the acting guildmaster of the Arcanists' Guild. She stands in for the absent leader and waits for you by the bookshelves.

What Thubyrgeim does in each quest
  1. Way of the Arcanist: Thubyrgeim says arcanima draws on aether, a living energy, lets you call a helper named Carbuncle, and needs calm thinking in battle. After a trial against pests, she welcomes you as an arcanist and gives you a hunting log. Her name means "Magic Jewel".
  2. What's in the Box: Thubyrgeim reminds her arcanists to eat. Her guild inspects cargo at Mealvaan's Gate, so she sets you a practice cargo check. She calls K'lyhia odd but the guild's best tactician, and hopes you can widen K'lyhia's view beyond arcanima.
  3. Tactical Planning: Thubyrgeim has you slay three roselings and three wild jackals, calling three the perfect sample size, then sends you with K'lyhia. Pleased, she allows you to train at other guilds, but advises mastering arcanima first. Off duty, the twenty-nine-year-old teaches children to read.
  4. Topaz Teachings: Thubyrgeim notices you look tired and asks if you sleep properly, since reasoning suffers without rest. Each of her lessons starts with such a health check. She teaches you to summon Topaz Carbuncle, a magic ally, for use if the inspection turns sour.
  5. Over the Rails: Thubyrgeim says the mercenaries are old hands at guarding K'lyhia. She tells you the captain was the pirate Doesmaga, exiled years ago, who has hurt K'lyhia before. She regrets sending her and urges you to turn your anger into training.
  6. Pincer Maneuver: Thubyrgeim tells you K'lyhia's past: she was a young prisoner on Doesmaga's slave ship, and the guildmaster calmed her with a grimoire (a magic book). Thubyrgeim leads the ambush, calling out K'lyhia's combat patterns, and says there is still something they can do.
  7. Grimoire Fandango: Thubyrgeim believes only the absent guildmaster can help K'lyhia, as he did once before. She tells you his name, K'rhid Tia, though he prefers not to use it. She is glad when K'lyhia recovers, and finds both her and the guildmaster hard to read.
  8. Sinking Doesmaga: Thubyrgeim takes the satchel so the costume can go back to its owner. She is glad K'lyhia is free of her past; seeing her suffer pained her. She credits you with bringing K'lyhia and the guildmaster together and gives you a new technique.

Merlwyb

In 7 quests, first met in Feint and Strike

Merlwyb has not met you face to face as this quest begins.

What Merlwyb does in each quest
  1. Edelweiss, Edelweiss: The Encyclopaedia Eorzea says Admiral Merlwyb gave an order that banned piracy. After that order, a group called the Upright Thieves became the Rogues' Guild.
  2. Close to Home: Murie says Admiral Merlwyb keeps several arcanists on her personal staff. Fearing their art would die out, as it passed only from master to chosen student, she ordered an official Arcanists' Guild and paid for research and training.
  3. On to Summerford: Staelwyrn took Admiral Merlwyb's offer to put pirates stuck on land to work in the fields. The panel notes add that Summerford is part of Merlwyb's plan to end piracy by giving former pirates land to work.
  4. Feint and Strike: Merlwyb Bloefhiswyn, Admiral of Limsa Lominsa, thanks you at the Coral Tower. You seem familiar to her. She calls Baderon a good friend and invites you to a banquet as guest of honor. Her names mean "Sea Woman" and "Blue Fish's daughter" in Roegadyn.
  5. High Society: Merlwyb does not appear. Reyner says it is very rare for the Admiral to invite an adventurer to a state banquet. Baderon teases you as "Merlwyb's guest of honor."
  6. A Mizzenmast Repast: Merlwyb tells of the lost Warriors of Light. She sees you as chosen by the Mothercrystal, the being in your vision, and has a task for you. Her father Bloefhis worked with the Sahagin; she challenged him to a duel and came back alone.
  7. The Lominsan Envoy: Merlwyb proposes memorial services in each city-state on the fifth anniversary of the Battle of Carteneau. She makes you her personal envoy to Gridania and Ul'dah and gives you an airship pass. She says you have a quality that recalls history's champions.

K'lyhia

In 7 quests, first met in What's in the Box

K'lyhia is a Miqo'te assessor at Mealvaan's Gate, where cargo is checked. You first meet her as a stranger who watched you fight, and she asks you to ignore her.

What K'lyhia does in each quest
  1. What's in the Box: Thubyrgeim chose her to guide your training. K'lyhia loves calculations: she puts your odds of becoming a notable arcanist at 90%. Her worn starter grimoire (spellbook) was the absent guildmaster's gift; she rose to foreseer with it. Then she leaves to test tactics in battle.
  2. Tactical Planning: K'lyhia, a foreseer at Mealvaan's Gate, the city's customs, inspects the Boilstox, goblin peddlers suspected of smuggling. She plans tactics well but lacks the reflexes to use them. She teaches you to know your own strengths, and rates your chance of greatness 97%.
  3. Topaz Teachings: K'lyhia checks merchant ships in Limsa Lominsa's ports daily for Mealvaan's Gate. She is about to board a ship suspected of smuggling and puts the odds of resistance at 75%. She requires you to learn Topaz Carbuncle first, and keeps asking until you agree.
  4. Over the Rails: K'lyhia plans with odds and named tactics. Your skill reminds her of the guildmaster. You clear the pier and deck, but the captain, Doesmaga, an exiled pirate who hurt her before, terrifies her. He throws her grimoire (spell book) overboard and she faints.
  5. Pincer Maneuver: K'lyhia was once a young prisoner of the pirate Doesmaga. The guildmaster gave her the grimoire (spell book) she has always carried. She plans an ambush to win it back, but seawater has ruined it; she puts repair at 0%. Crushed, she goes home.
  6. Grimoire Fandango: K'lyhia's mind has gone silent in her sadness. She guesses that you met the guildmaster. His new grimoire matches the first one he gave her, and she reads his message: shape reality as she wants. She resolves to defeat Doesmaga and returns to duty.
  7. Sinking Doesmaga: K'lyhia's chain of trades gets you both onto Doesmaga's ship, with her dressed as a dancer. She fights to cast off the shackles he put on her soul, and wins. Then she leaves to seek out the guildmaster, to understand the reality she wants.

H'naanza

In 6 quests, first met in The Rats in the Wharf

H'naanza has a simple, well-paid job for any adventurer looking for something to do.

What H'naanza does in each quest
  1. The Rats in the Wharf: H'naanza tells you Baderon is offering a reward to anyone who kills at least five wharf rats. Plenty of them lurk outside the Tempest Gate, so H'naanza urges you to hurry and take the chance.
  2. Back in the Water: H'naanza's workshop, Naldiq & Vymelli's, is busy building a galleon (a large ship). Still, the Fishermen's Guild is an old, valued client, so she promises to do her best for Sisipu. She is a famous shipbuilder who designed the Triumph, flagship of Limsa's Crimson Fleet.
  3. A Bridge Too Full: An angry coachman on Oschon's Embrace says his load from the Drydocks is meant for Forgemaster H'naanza herself, and demands that the way be cleared.
  4. Relighting the Torch: H'naanza is annoyed: she sent someone to fix the beacon's furnace less than a week ago. She guesses the trapped bomb was too wild, and agrees to send an artisan to strengthen the furnace. She swears "Byregot's beard", calling on the craftsmen's god.
  5. On to the Drydocks: H'naanza sends you with a letter to Ahtbyrm, the head shipwright at the Moraby Drydocks. Her guild forges the ship's parts, while the building happens at the docks. She sees passing on the armorer's skills as her "Builder-given duty".
  6. Beauty Is Only Scalp Deep: H'naanza guesses at once that Jandelaine has lost his tools again, and has no sympathy for his drama. Still, H'naanza gives you a package for him, with a warning: if he loses these, the next pair gets grafted into his hands.

Y'shtola

In 6 quests, first met in Lurkers in the Grotto

You meet a woman called only the 'Cultured Conjurer' at Seasong Grotto. She carries a strange contraption and reads the sailors' prayer carved in stone there.

What Y'shtola does in each quest
  1. Lurkers in the Grotto: Her name is Y'shtola; she studies aether and hunts the kidnappers too. After you beat an enraged goobbue together, she finds a sailor's knife in it and suspects pirates. Your talk of a towering crystal surprises her. Staelwyrn vouches for her.
  2. Just Deserts: After the golem fight, near Y'shtola you see a vision of her past: she fears the beast tribes may summon primals (summoned gods), as Louisoix foretold. She can see aether. She calls herself a naturalist, links the pirates to the Sahagin, and takes Sevrin home.
  3. Feint and Strike: Y'shtola arrives when she senses the masked mage and fights beside you. She names him an Ascian, one of the "Bringers of Chaos" who steer the beast tribes. She is a Sharlayan and, surprised you know it, decides you have "a special gift."
  4. A Mizzenmast Repast: Y'shtola sees an extraordinary glow and names it one of the Crystals of Light. She recalls the vision of a towering crystal you had after your encounter with the goobbue, and concludes that you bathed in Her Light. Merlwyb agrees.
  5. Into a Copper Hell: She appears after you help the woman, saying she has watched you since you left Limsa Lominsa. She praises your humble, selfless deeds, but your visions interest her most; a friend shares that gift. She invites you to join the Scions of the Seventh Dawn.
  6. The Scions of the Seventh Dawn: Tataru is startled when you say you are here at Y'shtola's request, and quickly lets you in.

Reyner Hansred

In 5 quests, first met in Feint and Strike

Commodore Reyner is at the Coral Tower, hoping for a quiet day, unaware of Baderon's warning.

What Reyner Hansred does in each quest
  1. Victory in Peril: Ghimthota mentions him at the end: the captured pirates go to the Yellowjackets, and "Reyner's men" now take over the investigation. So Reyner commands men of the Yellowjackets.
  2. Feint and Strike: Reyner trusts Baderon, who is "rarely wrong," but a Sahagin attack on South Tidegate takes his troops. He sends you to Swiftperch instead, wishing the Warriors of Light still walked among them. Afterward he praises you warmly and presents Admiral Merlwyb.
  3. High Society: Reyner says few get this honor, not even the Admiral's officers, but you earned it. He sends you to Baderon for proper clothes. He was never a pirate; he began as an officer under his teacher, Commodore Sthalmann. He cares for an old cat.
  4. I Hereby Relieve You: Falkbryda reads his dispatch. He has hired an adventurer "of excellent repute and pleasing manner" to finish the Seagrot work, and that adventurer is you. Like Falkbryda, he feels their forces are spread too thin.
  5. It's Probably Pirates: He reports a strange ship seen near the Isles of Umbra. His patrol found only a family of coeurls (wild beasts) in Sastasha, but he wants it searched again. With the Sahagin testing his defenses daily, he cannot spare men, so he asks you.

Falkbryda

In 5 quests, first met in Walk of Shame

Commander Falkbryda is at Camp Skull Valley, a Maelstrom outpost. S'nairoh fears what she may decide about her pay.
What Falkbryda does in each quest
  1. Mountains out of Molehills: S'nairoh says Commander Falkbryda threatened to cut her pay if she caused another false alarm. After the hedgemole mix-up, S'nairoh expects the commander to cut it.
  2. Walk of Shame: Falkbryda has heard of your help to the Maelstrom. She dislikes that S'nairoh did not come herself, but notes her report is honest. She calls boredom a soldier's worst enemy. She cuts S'nairoh's pay but writes no formal blame. Her name means 'Falcon Bride'.
  3. Nest We Forget: Dodos nest even inside the barracks, and she wants the nest gone before it draws dangerous beasts. She praises your speed. The camp guards against the kobolds of O'Ghomoro to the north; kobold skulls once lined the valley floor, giving its name.
  4. Scythe Extra Large: Falkbryda knows you well by now and thanks you for the camp. She praises Sergeant Roehanth's quick thinking. She worries that pests and beasts distract them from the war against the Sahagin. She seems to see new value in using adventurers.
  5. I Hereby Relieve You: She has a dispatch from Commodore Reyner: an adventurer is taking over the Sastasha Seagrot work, and it is you. She is happy to pull her men out, since forces are spread too thin. She sends you to relieve Catguistl.

Yellowjacket

In 4 quests, first met in Coming to Limsa Lominsa

This Yellowjacket is an officer of Limsa Lominsa's guard. You meet him at the Drowning Wench.

What Yellowjacket does in each quest
  1. Coming to Limsa Lominsa: This Yellowjacket says pirates attacked your ferry and suspects you signaled them. Kidnappings keep happening and the guards have no suspects, so they distrust outsiders. Baderon vouches for you and offers him ale; he hopes it is not watered down like last time.
  2. Feint and Strike: A Yellowjacket rushes in: the Sahagin are attacking South Tidegate, and the garrison needs help at once. At Swiftperch, Yellowjackets fight beside you, shouting "For Limsa Lominsa!" Back at the Coral Tower, one announces the Admiral and cheers your seat at the feast.
  3. It's Probably Pirates: This scout says a ship was seen near the Isles of Umbra, and rough men near the cave. He fears they are Serpent Reavers, pirates who serve the Sahagin, marked by blue face tattoos. People still remember the kidnappings. He asks you to find out.
  4. Sinking Doesmaga: Once Doesmaga is beaten, this Yellowjacket thanks you. Without your bravery and skill, the Yellowjackets would still be floundering after the pirate. The soldier also sends regards to Thubyrgeim.

Bhirdraeg

In 4 quests, first met in The Time Is Ripe

Bhirdraeg grows La Noscean oranges. They are ripe and about to fall, but the retired pirates working under him refuse to pick them.

What Bhirdraeg does in each quest
  1. The Time Is Ripe: Bhirdraeg is delighted with the sweet oranges and pays you partly in goods, including 10 Orange Juice. He wishes scurvy (a sickness fresh fruit prevents) on the ex-pirates he finds lazy, and mocks the Admiral: you can't teach an old sea dog new tricks.
  2. Orange Crush: Because puks eat the bees, his workers must pollinate every orange by hand. With the hatchlings gone, the bees can work. Bhirdraeg still calls the ex-pirates the real pests, 'whelps-out-of-water' (like fish out of water), and wishes you could rid him of them too.
  3. Double Dealing: In idle talk, Bhirdraeg says La Noscean oranges are full of nutrients, sweet, and vital for keeping scurvy away. That is why Sevrin calls the sack 'scurvy snacks'.
  4. Plowshares to Swords: Bhirdraeg stands by while Pfrewahl talks, both when he asks for the tools and when you bring them back. He speaks no words in this quest.

Anaoc

In 4 quests, first met in Cry Me a Liver

Anaoc is Ancreta's grandfather and the head of the Red Rooster Stead, a farm. He has asked her to bring him rivertoad livers.

What Anaoc does in each quest
  1. Cry Me a Liver: Anaoc sighs that he should not have sent Ancreta, and apologizes for the trouble. He heard the New Worlders use fish livers as fertilizer, so he is trying toad livers. He says a farmer must keep learning; that is how his farm grew.
  2. Wool's Errand: Anaoc grumbles that the courier who usually takes the wool is lazing in bed. He asks you to bring the sack of fleece to Weitzaren, the miller up north who turns the Stead's wool into felt (thick pressed cloth).
  3. Kobolds and Indigents: Anaoc sighs that the kobolds are at it again. He says they leave their underground homes to wreak havoc on Lominsan land, and the farmers' livelihoods are at stake. Since neither side gives ground, he fears there may be no peaceful end.
  4. Bait and Swat: Anaoc explains an old pact: the sea for Limsa, the underground for the kobolds. He says a pact means nothing if it ruins them, so they must strike first. He likes Arenlona's bait plan, then asks you to seek Baderon's help getting Yellowjacket guards.
Weitzaren

In 4 quests, first met in Wool's Errand

Weitzaren is the miller at the Grey Fleet, north of the Red Rooster Stead. Anaoc calls him the "manic miller". He is waiting for the Stead's wool.

What Weitzaren does in each quest
  1. Wool's Errand: Weitzaren rants that a miller with no fleece is like an artist with no canvas, and curses the lazy courier. Once the wool is his, he is delighted and laughs like a villain in a play. Now he can make his felt.
  2. Flour Power: Weitzaren, high miller of the Grey Fleet, loves grain even more than felting wool, and makes many mill puns. He has you slay the galagos and take the flour to Skarnmhar at the Stead. His name means "Wheat Harvest" in the old Roegadyn language.
  3. What Goes Around: Weitzaren hopes you enjoyed the tour and were impressed. He calls the nick in Eshushu's sail most worrisome and orders a fix at once. To him, waiting for trouble only invites trouble; the Grey Fleet stops for nothing.
  4. Kobolds Ahoy: Weitzaren does not appear in this quest. Loetrswys says he passes off the kobold crimes as mere mischief, and that he cares more for his mills than for his workers.

Sevrin

In 4 quests, first met in Washed Up

Sevrin is one of the ex-pirate farmhands at Summerford Farms. Staelwyrn calls him a sea-sloth who is never around when there is work.

What Sevrin does in each quest
  1. Washed Up: Sevrin mocks you as Staelwyrn's errand runner and says he does not care for landlubbers. He tells you to ride off on your chocobo (riding bird). He promises to come, but he is the only one who does not return to work.
  2. Double Dealing: Sevrin's deal with the goblins went wrong, and he fled, leaving his mates in trouble. He asks you to rescue them. Then he says a pirate knows no shame, but hands over the oranges because he likes you. He is grateful, but not sorry.
  3. Plowshares to Swords: Pfrewahl says he saw Sevrin meeting the pirates in secret, and thinks he helped steal the tools. Staelwyrn hears of it and vows to punish his treachery.
  4. Just Deserts: Sevrin was once a Serpent Reaver, pirates who serve the fish-like Sahagin. He fled to the farm. The Reavers wanted his mates for his freedom; he led them into a trap, then tried to die saving them. Now he wants to face the Yellowjackets.

Louisoix Leveilleur

In 4 quests, first met in A Mizzenmast Repast

Louisoix is not part of the events as this quest begins.

What Louisoix Leveilleur does in each quest
  1. Just Deserts: Y'shtola says the rising seas and the falling lesser moon are as Louisoix foretold. He called on the Twelve, Eorzea's guardian gods, to prevent the Seventh Umbral Era (an age of calamity), then vanished in a blinding light.
  2. A Mizzenmast Repast: Your vision of the final moments of the Battle of Carteneau also shows Louisoix.
  3. The Lominsan Envoy: Kan-E-Senna calls him Archon Louisoix. She says he might have explained the mysteries of Carteneau, but like so many, he never returned from that battle.
  4. The Scions of the Seventh Dawn: Minfilia says you came back after five long years, just as Louisoix said you would. She hopes he is watching, and that he may now rest in peace, his mission fulfilled.
Ghimthota

In 4 quests, first met in Do Angry Pirates Dream

Ghimthota is head of the watch, the guards of the Moraby Drydocks. She believes pirates camping nearby may be planning an attack on the Victory.

What Ghimthota does in each quest
  1. Do Angry Pirates Dream: Ghimthota has had her men watch you since you arrived, as with all newcomers, and found nothing wrong. She sends you to spy on the pirates. Hearing they want "me boy back", she wonders if the Victory was ever their target, and orders more patrols.
  2. Say It with Flowers: Ghimthota barely remembers Rostnzeh, and only because lilybells make her sneeze. Flattered, she says no: her duty comes first until the Victory's christening, its naming ceremony. Yet she does not rule out a visit after that. Her family name is Sthalmoenwyn.
  3. Victory in Peril: Ghimthota sends you to fight the pirates while she tends a wounded soldier. She calls the Victory the hope of Limsa Lominsa. She admits security must improve, hopes finishing the ship can heal Ahtbyrm, mentions a strange object they found, and asks another favor.
  4. Men of the Blue Tattoos: The letter is in a strange script no one around her can read, and the Maelstrom wants to know its secrets. Ghimthota has heard the Yellowjackets turn to Baderon's "connections," so she trusts you to hand it to Baderon alone.

Mother Miounne

In 4 quests, first met in Call of the Forest

Mother Miounne runs the Carline Canopy in Gridania. She is Baderon's counterpart there.

What Mother Miounne does in each quest
  1. Call of the Forest: She first greets you as a diner, then is delighted to learn you are the adventurer Baderon sent. She offers to brief you when you are ready. She cries "The Matron be praised!" A chart note says the Matron is Nophica, Gridania's guardian goddess.
  2. Fire in the Gloom: She describes the Tam–Tara Deepcroft, a Gelmorran settlement where Gridanians bury their dead. Afterward, she passes on Lewin's thanks. She says adventurer deaths are rising as untrained people take on too much, as one broken party shows. She then offers a job from Ul'dah.
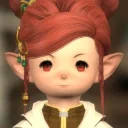
  3. Call of the Desert: She sends you to Momodi, who runs the Quicksand in Ul'dah, and calls her the sultanate's version of herself. She expects Momodi to send you into danger, but trusts you to come through unhurt.
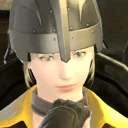
  4. Into a Copper Hell: Momodi tells you that you are every bit the adventurer Miounne said you would be.

Niniya

In 3 quests, first met in Making a Name

Niniya is a veteran adventurer in Limsa Lominsa. Niniya has a tip that might help a new adventurer like you make a name.

What Niniya does in each quest
  1. Making a Name: Niniya sends you to collect herbs that might be illegal "dream flowers" and hand them in. They are only common lavender: Niniya was playing a joke on you. Niniya says adventurers have met at this place for almost twenty years.
  2. Close to Home: Baderon points Niniya out and suggests you hear what she has to say. Small errands like hers, he says, build your name as someone folk can trust, and then the jobs get harder and pay better.
  3. Fool Me Once: Niniya says the key lesson for new adventurers is to question everyone's motives. Niniya sends you to Ancreta at the Eyes for work, but it is a second prank, after the quest Making a Name: Ancreta cannot hire you directly.

J'nasshym

In 3 quests, first met in Edelweiss, Edelweiss

J'nasshym of the Brugaire Consortium, a business, is at the Octant. She is looking for a free adventurer to make a delivery.

What J'nasshym does in each quest
  1. Edelweiss, Edelweiss: J'nasshym sends a thank-you gift to the Dutiful Sisters of the Edelweiss, who did a service for her firm. She does not say what they do, but says they are more than they seem and that they reassure businesses like hers.
  2. High Society: J'nasshym greets you as the "underdressed" guest Baderon mentioned and says he was not exaggerating. She chose items for your debut in polite society and hands you a raxa-lined box.
  3. A Mizzenmast Repast: If you lose the dress shoes, J'nasshym gives you another pair, out of kindness and the loathing she bears for your usual "attire."

Ginnade

In 3 quests, first met in Lost and Found

Ginnade, in Limsa Lominsa, is worried. An alarming number of citizens have gone missing lately.

What Ginnade does in each quest
  1. Lost and Found: Ginnade has made a list of missing people from citizens' reports and asks you to take it to N'delika, a colleague in Bulwark Hall. Ginnade's motto: protect the common folk, and they act as your eyes and ears.
  2. Licensed to Reave: Ginnade sees that the 'spice' is Garlean firesand, an explosive powder, and may order some. Ginnade explains that Carvallain calls anything gained at sea 'spice', and that he is no pirate but a heavily armed trader for Lominsan interests in the East.
  3. Pincer Maneuver: Ginnade says the Yellowjackets questioned K'lyhia about the pirate Doesmaga, exiled six years ago for black market trading and now back. K'lyhia was once his prisoner. But she asked the questions, and Ginnade thinks she went back to your guild.

Skarnmhar

In 3 quests, first met in Flour Power

Skarnmhar works at the Red Rooster Stead. Weitzaren says Skarnmhar takes care of the flour once it reaches the Stead.

What Skarnmhar does in each quest
  1. Flour Power: Skarnmhar is relieved to get the flour back; eggs and milk are useless without it. But he worries that the Stead hires no guards, relies on kind adventurers, and is not ready if trouble comes again.
  2. Kobolds and Indigents: Skarnmhar sends you to help the coachman, Wahoy Mahoy, who is plucky but alone. When you bring back three bags of clothes, Skarnmhar fears the restless kobolds are not done. He says war is at their doorstep and tells you to inform Anaoc.
  3. Bait and Swat: Skarnmhar happily gives you dodo meat for the bait and calls the deal a bargain: dead dodo for dead kobolds. He sends you to K'wabati, south of Blind Iron Mines, who knows where to set it.
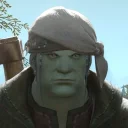
Arenlona

In 3 quests, first met in Bait and Swat

Arenlona of the Dawn Meadow is the one Anaoc sends you to for a plan against the kobolds.

What Arenlona does in each quest
  1. Bait and Swat: Arenlona is glad Anaoc has dropped his naive hope that the kobolds would calm down alone. Arenlona explains that kobold numbers have grown and food is short, so hunger drives their raids. The plan: set food as bait and let hunger undo them.
  2. Whack-a-Mole: Arenlona spent years breeding ogre pumpkins that resist fire, drought, frost, pests and festive rituals, yet moles still steal them. She decides to keep seeking complex solutions and have you do the killing. Her name means 'Harvest Gatherer' in old Roegadyn.
  3. Beetle Juice: Arenlona reasons that aphids fear ladybugs, so the scent of ladybug blood on crops keeps aphids away; she calls this manipulating nature. She admits living ladybugs already protect the crops, but sees no science in that.

Moegramm

In 3 quests, first met in Kobolds Ahoy

Moegramm works at the Red Rooster Stead. He is Loetrswys's beloved, and she hopes he can help her with the kobolds.

What Moegramm does in each quest
  1. Kobolds Ahoy: Moegramm agrees the kobolds are a real danger, more so since they frighten his "little lamb", whom he loves most of any soul on two legs. He writes a warning to Ostfyr, wants the Yellowjackets called, and sends you through Blind Iron Mines.
  2. Moegramm Had a Little Lamb: Moegramm is the Stead shepherd. He cares for all three kinds of livestock, but sheep are his first love. He sends you to Chartain, then praises your work and speaks very tenderly of caring for sheep. His name means "Able Ram" in old Roegadyn.
  3. Much Ado About Dodos: Moegramm loves his dodos for their sweet eggs and tasty meat, once the poison glands are removed. He sends you to X'payan. When you bring the birds back, he calls them his babies, then asks you to watch them until they are ripe for slaughter.

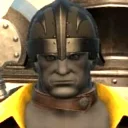
Aylmer

In 3 quests, first met in Washed Up

Aylmer is one of the ex-pirate farmhands at Summerford Farms, away from work when Staelwyrn calls for the crew.

What Aylmer does in each quest
  1. Washed Up: Aylmer acts tough and claims to take no guff from 'glorified gardeners'. Still, Aylmer agrees to go and see what Staelwyrn wants, if only to stop the nagging.
  2. Double Dealing: Aylmer is among Sevrin's mates caught by goblin muggers near a bonfire. After you save them, Aylmer thanks you and blames Sevrin, whose shove kept Aylmer from getting away.
  3. Just Deserts: Aylmer is furious: Sevrin led the men into a trap, saying it was a trip for a drink. Aylmer has learned to stay a step ahead of Sevrin, so he got away, and he begs you to help the others.

Sozai Rarzai

In 3 quests, first met in Washed Up

Sozai Rarzai is one of the ex-pirate farmhands at Summerford Farms, away from work when Staelwyrn calls for the crew.

What Sozai Rarzai does in each quest
  1. Washed Up: Sozai Rarzai says no one can work on an empty stomach and dares you to guess breakfast, which tasted like wood. Still, Sozai Rarzai does not refuse a summons from the captain.
  2. Double Dealing: Sozai Rarzai is among Sevrin's mates caught by goblin muggers. Once saved, Sozai Rarzai says 'my dodo would've been cooked', a twist on 'my goose is cooked', meaning doomed, then thinks hungrily of cooked dodo.
  3. Just Deserts: Trapped deep in the canyon, Sozai Rarzai calls Sevrin a schemer, but refuses to let him die for the men. He would rather bow to a fishback (a Sahagin, a fish-man) than owe Sevrin, and takes up arms.

Skribyld

In 3 quests, first met in Like Cats and Dogs

Skribyld is a Yellowjacket worried about coeurls, big cat-like beasts, and jackals killing each other around Aleport.

What Skribyld does in each quest
  1. Like Cats and Dogs: Skribyld believes the coeurls were smuggled into Vylbrand and sends you after the merchant R'kontai. Skribyld blames her greed, says she must answer for it, and has a plan to end the beasts' fighting. The name means "Write Make" in Roegadyn.
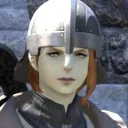
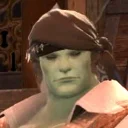
  2. Curiosity Killed the Coeurl: Skribyld sadly orders the last coeurls killed, putting people's safety first. Hearing that only an orphaned kitten is left, Skribyld is saddened, reports some pirates were caught, and, since the Yellowjackets cannot raise a coeurl, leaves the kitten in your care.
  3. Man's Best Fiend: Skribyld offers R'kontai a lighter sentence, not freedom, for her help. He is glad the pup is safe. Pirates tied to his case are now caught, though the ringleader is still free. With no room at headquarters, he asks you to keep the pup.

S'nairoh

In 3 quests, first met in Keep Your Day Job

S'nairoh is a new private in the Maelstrom, Limsa Lominsa's forces, at an Aleport cannon. She has only seen street and tavern brawls. Now she spots enemies in the sky.

What S'nairoh does in each quest
  1. Keep Your Day Job: S'nairoh talks herself through arming the cannon while you fight; her partner C'mell is missing. The 'enemy' is only newborn puks, flying beasts that never threatened Aleport. She is let down: she joined the Maelstrom to fight, not to break up brawls.
  2. Mountains out of Molehills: S'nairoh mistakes harmless hedgemoles for an attack of adamantoises (giant tortoises) and must stand down again. She hopes to become an officer, but fears losing pay she spends on ale. Blaming too much ale-fed blood, she rushes off to be treated with leeches.
  3. Walk of Shame: S'nairoh asks you to carry her report to Commander Falkbryda at Camp Skull Valley. Too weak from leechings to go, she fears jail. Falkbryda says S'nairoh was once among the first promoted, but slipped at Aleport. Her pay is cut, without formal blame.

Wiltswys

In 3 quests, first met in Mummy Dearest

Wiltswys is at Camp Skull Valley. Ahldfoet carries a letter for her from her mother, who has not seen her in years.

What Wiltswys does in each quest
  1. Mummy Dearest: Wiltswys is thrilled by her mother's letter, then furious: the mother who let her leave with nothing now wants money. She left her island for something better than farming and fishing, and refuses to reply. As a girl she was too poor for shoes.
  2. Toxic Avenger: Pleased you filled the vials, Wiltswys warms to you. The camp's foe is now the Sahagin, fish-like beastmen weak to poison, who destroyed the Halfstone settlement. With no home but this valley and no family but the Maelstrom, she fights for both.
  3. My Brother's Not a Keeper: She sends a bottle of lowland wine to each of the two tidegate captains, as a small quartermaster's treat. The tidegates guard narrow channels against the Sahagin. She admits the captains are brothers who bicker almost all the time.

Edda

In 3 quests, first met in It's Probably Pirates

Edda is the healer of a new adventuring party at the Hall of the Novice, sent out to buy supplies.

What Edda does in each quest
  1. It's Probably Pirates: Edda comes back late with only two potions, shocked at how much they cost. Avere scolds Edda for being slow and for barely healing a scratch. Edda apologizes, saying "I came as fast as I could!"
  2. Fire in the Gloom: Avere is dead. Edda says he ran out of range before the healing spell was done, and wishes they had eased his burden. Left alone by the others, Edda begs them to stay and asks Avere for forgiveness.
  3. Into a Copper Hell: Edda tells you Avere, the party leader, was killed in Gridania. They were to marry in spring, and he admired you deeply. Edda thought of quitting, but you inspire her to train again in her home village. She asks your name: "I shan't forget."

Isildaure

In 3 quests, first met in It's Probably Pirates

Isildaure is an old adventurer resting outside Sastasha.

What Isildaure does in each quest
  1. It's Probably Pirates: He has adventured for more seasons than he can count and is still amazed by the realm's beauty. He says a thirst for the unknown, not riches or fame, drives adventurers. Alianne, who calls him Grandfather, travels with him.
  2. Fire in the Gloom: He admits that childish curiosity led him into a basic mistake, and only fruit that Alianne found saved him. He reminds himself to look before he leaps, and decides to rest awhile.
  3. Into a Copper Hell: He says adventuring has always been about growing through challenges you choose to face. Experience brings a love of justice and self-sacrifice, shaped by your choices. He tells you he senses a light within you.

Alianne

In 3 quests, first met in It's Probably Pirates

Alianne is a traveler resting with an old adventurer outside Sastasha.

What Alianne does in each quest
  1. It's Probably Pirates: Alianne calls Isildaure Grandfather and says they go wherever the wind takes them, for the joy of freedom. The years are wearing on him, Alianne notes, but only death could end his hunger for adventure.
  2. Fire in the Gloom: Alianne saved Isildaure with fruit picked on the way. Age has made him more reckless, not calmer, Alianne says. Alianne understands he wants to use the time he has left, but fears one misstep could end it.
  3. Into a Copper Hell: Alianne tells you they found Dolorous Bear and the whole party dead, killed by the giants after rushing a horde. Alianne suspects a wish to beat past feats made them reckless. Goals matter, but fixing on them alone has a price.
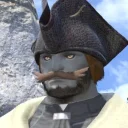
Dolorous Bear

In 3 quests, first met in It's Probably Pirates

Dolorous Bear is an adventurer at the Drowning Wench, asking Baderon about the Sastasha job.

What Dolorous Bear does in each quest
  1. It's Probably Pirates: Dolorous Bear learns you already did the job and admits the party waited too long. Their goal: heroic deeds sung in every alehouse in Eorzea. Dolorous Bear urges you to have a goal too, calling goals "arms and armor for the spirit."
  2. Fire in the Gloom: Dolorous Bear is not surprised to see you again, admits you took the prize back in Limsa, and vows that the party gives you a tougher contest this time.
  3. Into a Copper Hell: Alianne says Dolorous Bear and the whole party were found dead, killed by the Copperbell giants after rushing a horde. Alianne thinks their wish to beat past feats made them reckless.

Momodi

In 3 quests, first met in Call of the Desert

Momodi runs the Quicksand in Ul'dah. She is busy when you walk in.

What Momodi does in each quest
  1. Call of the Desert: She first takes you for a customer, then knows you. Miounne called you "the adventurer of the moment," big praise from her. A chart note says her hairpin recalls a young man whose future she changed by pushing him too hard.
  2. Into a Copper Hell: She recalls a news article about the mines reopening, and guesses the miners dug too deep. When you return, she is glad you are safe. She never wanted to run the guild, but now feels privileged. She warns the Scions are no ordinary folk.
  3. The Scions of the Seventh Dawn: She jokes that adventurers always pick the door marked death. She vouches that the Scions are good people tackling Eorzea's worst problems. She swears you to secrecy, sends you to the Waking Sands in Vesper Bay, and asks you to visit old helpers sometimes.

Ryssfloh

In 2 quests, first met in Coming to Limsa Lominsa

Ryssfloh is a Yellowjacket, one of the guards of Limsa Lominsa. Ryssfloh greets you as you arrive in the city.

What Ryssfloh does in each quest
  1. Coming to Limsa Lominsa: Ryssfloh sends you to the Drowning Wench to register with the Adventurers' Guild and meet its owner, Baderon. Ryssfloh warns the alleys are dangerous and asks the Navigator, the sea goddess Llymlaen, to guide you. Ryssfloh's name means "Giant Flea" in Roegadyn.
  2. Feint and Strike: Ryssfloh sees how far you have come since the "wide-eyed whelp" fresh off the ferry. Ryssfloh leads the defense of Swiftperch, a town its people rebuilt after the Calamity, a great disaster, then closes the kidnapping case and sends regards to the Scions.

Skaenrael

In 2 quests, first met in Making a Name

Skaenrael works the Crow's Lift, which carries people down to Bulwark Hall, the first floor of the Mizzenmast.

What Skaenrael does in each quest
  1. Making a Name: Skaenrael takes you down to Bulwark Hall. She advises anyone who wants to make Limsa Lominsa home to attune to the aetheryte, a travel crystal, on the lower decks.
  2. Suspiciously Sober: Skaenrael only reminds you that the Crow's Lift is the fastest way down to Bulwark Hall.

Ahldskyf

In 2 quests, first met in Making a Name

Ahldskyf is a well-traveled ship captain at the Octant. Niniya says he knows a lot about shady goods.

What Ahldskyf does in each quest
  1. Making a Name: Ahldskyf first jokes that the herbs are deadly "dream flowers", then admits they are only Althyk lavender, likely spilled from crates for his own ship. He captains the Orion. His name means "Old Ship" in Roegadyn.
  2. Suspiciously Sober: Ahldskyf says a scruffy sailor offered him much gil (money) to meet adventurers. Fearing a link to the kidnappings, he sends you to the guard Glazrael. A hired captain, he was one gil short of his own ship when the Calamity struck.

Glazrael

In 2 quests, first met in Suspiciously Sober

Glazrael is a guard at the entrance to East Hawkers' Alley, a busy street full of merchants and travelers.

What Glazrael does in each quest
  1. Suspiciously Sober: Glazrael thanks you and promises to have her captain put the Yellowjackets, the city guard, on high alert. She sends you to warn Frydwyb, who deals with many adventurers. She also explains the Octant is named after a navigation tool invented by Jovanni Gnonno.
  2. Feint and Strike: Glazrael is fed up with the pirates' "feint after bloody feint." In the fight, Glazrael battles beside you, eager to "split some heads," and urges you to keep pummeling the masked mage.

Frydwyb

In 2 quests, first met in Suspiciously Sober

Frydwyb works further down East Hawkers' Alley. She offers adventurers the services of retainers, hired helpers.

What Frydwyb does in each quest
  1. Suspiciously Sober: Frydwyb hears your warning about a strange sailor seeking adventurers, maybe tied to the kidnappings. She promises to warn her customers and keep a sharp lookout, since shady acts often go unnoticed in the busy alley.
  2. An Ill-conceived Venture: She is glad you saved the retainer; another retainer death is the last thing they need. She explains ventures: trips retainers make to gather items, set up with the Adventurers' Guild. You pay with special scrip, also called ventures, and she gives you some.

Murie

In 2 quests, first met in Way of the Arcanist

Murie is the receptionist of the Arcanists' Guild, a school of magic. Murie asks whether you still want to join.

What Murie does in each quest
  1. Way of the Arcanist: Murie praises your choice and explains that the guildmaster cannot be reached for now. Murie sends you to Thubyrgeim, the acting leader, whose mind is sharp and critical but whose manner is welcoming.
  2. Close to Home: Murie explains arcanima: using "arcane geometries", precise patterns, to shape aether into magic. It began with the math of the south sea isles. Admiral Merlwyb ordered the guild founded so the art would not die out. Murie asks for your commitment.

K'rhid Tia

In 2 quests, first met in Way of the Arcanist

K'rhid Tia is the guildmaster of the Arcanists' Guild, the guild you want to join.

What K'rhid Tia does in each quest
  1. Way of the Arcanist: K'rhid Tia is not at the guild. Murie says he cannot be reached for now, and Thubyrgeim calls him a "wayward leader". He likes to roam and is often away, so Thubyrgeim does his duties.
  2. Grimoire Fandango: You meet K'rhid Tia. The clues and the dancing were his way to meet you. He keeps notes on every guild member and loves to steer events. He gives you a grimoire for K'lyhia. Tia, his second name, is a Seeker of the Sun rank.

P'tahjha

In 2 quests, first met in Duty Calls

P'tahjha works at Mealvaan's Gate, where Limsa Lominsa checks imported goods and collects duty, a tax on them.

What P'tahjha does in each quest
  1. Duty Calls: P'tahjha explains that some merchants try to dodge duty and must be chased down. P'tahjha has you carry ledgers about them to Sundhimal at the Octant and Latisha at the Bismarck, places where merchants gather.
  2. Proper Procedure: P'tahjha has been waiting for Sweetnix's import records and is glad they arrive in time. He is late every month, and she thinks about expelling him. She sends him kind words: traders who follow the rules are welcome.

Sundhimal

In 2 quests, first met in Duty Calls

Sundhimal is a man who stands guard at the Octant in Limsa Lominsa.

What Sundhimal does in each quest
  1. Duty Calls: Sundhimal sighs at more unpaid duty and vows to drag any offenders to Mealvaan's Gate. He shows you the way to the Bismarck. He also says travel fees at aetherytes, the travel crystals, pay off a debt, much of it owed to businessmen from Ul'dah.
  2. Close to Home: Sundhimal says he is a Yellowjacket who keeps the peace and teaches newcomers about aetherytes. These crystals tap aether for fast travel with the Return and Teleport spells. He advises attuning to each one. Baderon has sent him many novices.

Latisha

In 2 quests, first met in Duty Calls

Latisha is a woman who works at the Bismarck, a place where people come to dine.

What Latisha does in each quest
  1. Duty Calls: Latisha is surprised that some of her diners evade taxes. She admits this may spoil their appetite, but agrees it serves the city. She promises to alert Mealvaan's Gate if any merchant on the list comes to eat.
  2. A Thousand Words: Latisha is proud of the Bismarck's fine food and service, so being cheated hurts twice as much. Latisha asks you to take R'sushmo's drawing of the man to the Yellowjackets (the city guard).

Swozblaet

In 2 quests, first met in The Right Price

Swozblaet is the master merchant of Hawkers' Alley, the city's market, and has work for an adventurer.

What Swozblaet does in each quest
  1. The Right Price: Swozblaet has you pose as a customer and secretly note the prices of Iron Thunder, Kyokyoroon and Syneyhil. Swozblaet calls it a simple task. You then hand the price list to Baensyng, as Swozblaet asked.
  2. Close to Home: Swozblaet is delighted to get back his octant, a navigation tool he left at the Wench. It is a keepsake from his days as a ship captain. To thank you, he explains where to buy gear and advises learning each stall's goods and prices.

S'dhodjbi

In 2 quests, first met in Glory Days

S'dhodjbi works for Baderon at the Drowning Wench. She worries he is so busy looking after others that he neglects himself.

What S'dhodjbi does in each quest
  1. Glory Days: S'dhodjbi wants to treat Baderon to aurelia umbrellas, slimy parts of creatures he ate in his old days. She misread his drunken talk: he hates them. She says Baderon once found her passed out, took her in and helped her drink less.
  2. Beauty Is Only Scalp Deep: She says the Slasher carries blades long enough to gut a whale, though no one has seen any blood. Impressed that you are not scared, she asks you to look into a scream she just heard outside.
Sisipu

In 2 quests, first met in I Stay the Streetlight

Sisipu is at the Fishermen's Guild, where she looks after the stores of streetlamp oil.

What Sisipu does in each quest
  1. I Stay the Streetlight: Sisipu is angry that N'tanmo asked her for this work, talking about savings, then handed it to you. Being young and pretty, she says, is no excuse. She is the Fishermen's Guild's acting guildmaster, and the teacher of anyone who takes up Fisher.
  2. Back in the Water: The Calamity (a great disaster) hit the fishing trade, but fisherfolk are returning to sea, and Sisipu wants to as well. Her guild always orders boats from Naldiq & Vymelli's, now very busy, so she sends you to ask H'naanza about the wait.

Ancreta

In 2 quests, first met in Fool Me Once

Ancreta is a Yellowjacket sentry at the Eyes, a tall rock outside the Tempest Gate past Madman Bridge, where guards watch the road.

What Ancreta does in each quest
  1. Fool Me Once: Ancreta says you were tricked: the Yellowjackets hire adventurers only through the Adventurers' Guild, and the rules forbid her to give work directly. Still, she has a personal request if you help unofficially. She guards the main road north to the Red Rooster Stead.
  2. Cry Me a Liver: Ancreta asks you to slay rivertoads for the livers. She cannot leave her post, and the sight of them turns her stomach, so you deliver them too. Her grandfather says she has been dainty since she was little.

Loetrswys

In 2 quests, first met in What Goes Around

Loetrswys is a miller at the Grey Fleet who likes to catch problems early, but has too much daily work to inspect the mill.

What Loetrswys does in each quest
  1. What Goes Around: Loetrswys proudly says the mill never stops, so neither can its millers. Loetrswys asks you to hear the other three millers' worries and report to Weitzaren. The name Loetrswys means "Pure Sister" in the old Roegadyn language.
  2. Kobolds Ahoy: Loetrswys complains that Weitzaren calls the kobold crimes mere mischief and cares more for his mills than his workers. Her beloved is Moegramm, who works at the Stead and calls her his "little lamb". She is sure he misses her.

Broenruht

In 2 quests, first met in Kobolds Ahoy

Broenruht is at Blind Iron Mines and knows the way through to the La Thagran Checkpoint.

What Broenruht does in each quest
  1. Kobolds Ahoy: Broenruht says most creatures of the dark mines leave you be if you leave them be, but kobolds can be more aggressive. The route is fairly safe, and Broenruht trusts an adventurer like you to handle it.
  2. Fire and Brimstone: Some miners shrug off the gas, but Broenruht writes the letters home when one chokes to death. Since the Calamity, a disaster five years ago, metal prices are high enough to make them rich or dead. Broenruht means 'Brown Smoke' in old Roegadyn.

Ostfyr

In 2 quests, first met in Kobolds Ahoy

Ostfyr is a Yellowjacket watchman (a kind of guard) at the La Thagran Checkpoint, an area that rarely sees kobolds.

What Ostfyr does in each quest
  1. Kobolds Ahoy: Moegramm's report opens Ostfyr's eyes to the kobold danger. He wants stronger patrols of the lowlands, or the region may be lost. He remembers when kobolds tried to seize the west, and asks you to warn Staelwyrn at Summerford Farms.
  2. Yarzon, Yarzoff: Ostfyr is pained that travelers reach his gates hurt by yarzons at the Rogue River, but needs every man to hold the garrison. The Maelstrom's fleet is spread too thin, so Yellowjackets hold La Thagran. His name means 'East Fire' in old Roegadyn.

Gurcant

In 2 quests, first met in Dressed to Call

Gurcant is a plant expert who teaches farming to the ex-pirates of Summerford Farms. You do not meet him in this quest.

What Gurcant does in each quest
  1. Dressed to Call: Staelwyrn mentions Gurcant in small talk as a top plant expert who teaches the ex-pirates to farm. But Staelwyrn adds there is only so much he can teach them.
  2. Loam Maintenance: Gurcant sends you to Rhotwyda in the orchard, sure she knows where blackloam is found. Neither of them tells you where it comes from. His idle line says he has fifty years of farming behind him.
Grynewyda

In 2 quests, first met in Rocks in a Hard Place

Grynewyda works at Summerford Farms and is looking for brave pioneers to help tame the wild land around it.

What Grynewyda does in each quest
  1. Rocks in a Hard Place: Grynewyda explains the farm is paid well under the Admiral's settlement plan, but loses the grant if the land is not cleared. The ex-pirates who work under Grynewyda laze about. After you clear the rocks, Grynewyda wishes they were half as hard-working as you.
  2. Just Deserts: Grynewyda saw Sevrin and his men head for Woad Whisper Canyon, singing about drink. They asked her to join; she refused. She asks you to give the idle men a cuff round the ear from her.

Pfrewahl

In 2 quests, first met in Loam Maintenance

Pfrewahl works the land at Tiller's Rest, where the dirt is so poor that even the weeds wither and die.

What Pfrewahl does in each quest
  1. Loam Maintenance: Pfrewahl is overjoyed by the blackloam. He has not seen any in ages and expects a fine harvest. Laughing, he tells you it comes from the aurochs' lair, and its stench says the rest. He thanks you.
  2. Plowshares to Swords: Pfrewahl has sworn to Staelwyrn that he fights no more, so he sends you to get the tools back. He says he saw Sevrin meeting the pirates in secret and wants Staelwyrn told. His name means "Joy Eel" in old Roegadyn.

Wyrkrhit

In 2 quests, first met in Sky-high

Wyrkrhit is the head of the Skylift, a wooden lift with pulleys that hauls cargo up the cliff of the Descent.

What Wyrkrhit does in each quest
  1. Sky-high: Wyrkrhit welcomes you because Baderon sent you. He says one fiery blast from a huge dragon split the ground and made the cliff, so they built the lift. He has too few workers and a growing list of headaches.
  2. Thanks a Million: Wyrkrhit calls the driver gutless for dumping a millioncorn seedling when a monster sprang from it. He sends you to recover it and take it to Lyulf at Swiftperch, and lets you keep whatever Lyulf pays, since the plant may hide more danger.
Kazai Buoyzai

In 2 quests, first met in Keeping It Fresh

Kazai Buoyzai is a cargo transporter at the Skylift. He has too many fish and too few water sprite cores to keep them cool.

What Kazai Buoyzai does in each quest
  1. Keeping It Fresh: Kazai Buoyzai sends you for three water sprite cores to chill his fish, then checks you know he does not mean "dance" literally. Pleased, he explains that the Skylift's delivery companies compete hard: one slip, and a rival steals your business.
  2. Baiting Buzzards: Kazai Buoyzai has you lure the buzzards with rotting rat meat and kill them. He makes most of his money hauling food, and says without you he would be sleeping in the gutter. He blames the Calamity, a great disaster, for the starving scavengers.

Lyulf

In 2 quests, first met in Thanks a Million

Lyulf waits in Swiftperch, a lifeless settlement in western La Noscea, for a millioncorn seedling he has bet his whole fortune on.

What Lyulf does in each quest
  1. Thanks a Million: Lyulf is overjoyed to get the seedling; this corn gives a huge yield. He wants to bring hope back to Swiftperch by growing an ocean of corn, and asks you to stay and help. He calls on Nymeia, the goddess of fate.
  2. Need to Breed: Lyulf's late father bred the dodos here; they escaped in the Calamity and went wild. To rebuild Swiftperch as it was in his father's time, Lyulf starts raising dodos from eggs, and must remove their poison-breath gland. He dreams of golden wheat fields.

Haldbroda

In 2 quests, first met in Without a Doubt

Haldbroda works at Candlekeep Quay. In his letters to Ahtbyrm, he says he never saw the missing shipwright Fyrilsmyd or his supplies.

What Haldbroda does in each quest
  1. Without a Doubt: Haldbroda calls Ahtbyrm a "self-righteous dog" and is shaken by the Turtleback Island threat. He swears on his grandmother's grave that he knows nothing. The Quay has been overwhelmed since a Lominsan cargo ship sank off the Salt Strand.
  2. Righting the Shipwright: Haldbroda tells you to stop questioning his character and help search the Salt Strand for survivors of the wreck. He suggests Fyrilsmyd may be among them. His name means "Kind Brother" in old Roegadyn, though he is unfriendly to you.

C'nangho

In 2 quests, first met in Do Angry Pirates Dream

C'nangho is a guard at the rear gate of the Moraby Drydocks, who knows where the suspicious camp lies.

What C'nangho does in each quest
  1. Do Angry Pirates Dream: C'nangho bet with other guards on whom Ahtbyrm would recommend, put money on you, and won: tonight's dinner is salmon, not sardines. C'nangho points you southeast to the pirates' camp, near a stone holy to Nymeia, the Spinner.
  2. Victory in Peril: C'nangho is glad of more help and says reports would gather dust on Ghimthota's desk without adventurers. C'nangho saw a pirate lurking by the cliff near Empty Heart and urges you to check before he hides his tracks.

Rostnzeh

In 2 quests, first met in Constant Carvings

Rostnzeh is a candlekeep, a lighthouse keeper, living alone at Oschon's Torch. Old Mimidoa calls him a dear friend.

What Rostnzeh does in each quest
  1. Constant Carvings: Rostnzeh is very lonely at the lighthouse. He carves jackal fangs to quiet voices calling him back to the sea. He says Mimidoa need not worry about him, and that he means to serve the sailors alone for the rest of his life.
  2. Say It with Flowers: Rostnzeh feels close to madness and loves Ghimthota. He first saw her on patrol, but was too afraid to meet her eyes. Since becoming head watch, she no longer climbs up. He sends you to tell her, with a La Noscean lilybell flower.

Kan-E-Senna

In 2 quests, first met in A Mizzenmast Repast

Kan-E-Senna is someone you have never met.

What Kan-E-Senna does in each quest
  1. A Mizzenmast Repast: You glimpse Kan-E-Senna in your vision of the final moments of the Battle of Carteneau, where Merlwyb says the Warriors of Light were lost.
  2. The Lominsan Envoy: Kan-E-Senna is Gridania's Elder Seedseer and leads the Order of the Twin Adder, its Grand Company. Your face recalls a brave soul she knew. She survived Carteneau and tells of it and the Calamity, backs the memorial, and sends word about her ill-behaved "wolf."

Raubahn

In 2 quests, first met in A Mizzenmast Repast

Raubahn is someone you have never met.

What Raubahn does in each quest
  1. A Mizzenmast Repast: You glimpse Raubahn in your vision of the final moments of the Battle of Carteneau, which comes to you as Merlwyb tells of the Warriors of Light.
  2. The Lominsan Envoy: Raubahn Aldynn is General of Ul'dah's Immortal Flames. You remind him of an old comrade. He says wolves, like the Garleans, cannot be tamed, fears Legatus Gaius van Baelsar could strike, calls the realm "an alliance in name only," and backs Merlwyb's memorial.
Dodozan

In 2 quests, first met in Good for What Ales You

Dodozan is a trader at Hawkers' Round, looking wildly about in a panic because a cask of ale has gone missing.

What Dodozan does in each quest
  1. Good for What Ales You: Dodozan keeps his client secret and avoids the Maelstrom and Yellowjackets, though the ale was for the Bloody Executioners, a pirate crew. He comes from Ul'dah and trades with anyone who pays, pirates or princes. He is relieved to get his payment.
  2. Pincer Maneuver: Dodozan saw and spoke with K'lyhia. She asked him about a Qiqirn smuggling ring based in Aleport, then the Yellowjackets, the city's soldiers, took her away. He sends you to Ginnade at the Coral Tower.

Bartholomew

In 2 quests, first met in The Lominsan Envoy

Bartholomew stands on the Hustings Strip in Ul'dah, admitting guests to see the Flame General.

What Bartholomew does in each quest
  1. The Lominsan Envoy: Bartholomew checks the Admiral's seal on your letter and lets you through to the Flame General.
  2. Call of the Sea: Bartholomew once went with the Flame General on an official visit to Limsa Lominsa, where he met Baderon. Baderon has a job for a capable adventurer, and Bartholomew says no one has better credentials than you.

Gaius van Baelsar

In 2 quests, first met in The Lominsan Envoy

Gaius van Baelsar is the legatus, or commander, of the Garlean Empire's XIVth Imperial Legion.

What Gaius van Baelsar does in each quest
  1. The Lominsan Envoy: Gaius's legion is dug in along Eorzea's borders. Raubahn says Gaius has long wanted conquest and fears Eorzea would fall if he struck now. In a scene among the imperials, Gaius recalls a countless army of dragons meeting the imperial fleet.
  2. Man's Best Fiend: Only a chart note links him here. The wolf pup's pet entry says the pup was bred as a war wolf for the Garlean army and looks up to Gaius, a legatus (high Garlean commander) called the Black Wolf.

Aersthota

In 2 quests, first met in Over the Rails

Aersthota is a mercenary hired to guard K'lyhia on the inspection of the Morningstar.

What Aersthota does in each quest
  1. Over the Rails: Aersthota is an old hand at escorting K'lyhia and trusts her tactics. Aersthota steers the landing boat and, when K'lyhia faints, helps carry her away and sends you to report to Thubyrgeim.
  2. Pincer Maneuver: Aersthota hides with Geissfryn across the ravine and springs the pincer attack (striking from both sides) when Thubyrgeim calls. After the fight, Aersthota wants to comfort the crushed K'lyhia, but Thubyrgeim says to give her time. Aersthota asks you to take care of her.
R'kontai

In 2 quests, first met in Like Cats and Dogs

R'kontai is a merchant near the Aleport gates whom Skribyld suspects of smuggling coeurls.

What R'kontai does in each quest
  1. Like Cats and Dogs: R'kontai flees, fearing pirates sent you, and her bodyguard fights you. She admits smuggling coeurls for pirates, who also had her breed jackals as watchdogs. The pirates let the coeurls escape and now use jackals to kill them. She calls herself a victim too.
  2. Man's Best Fiend: R'kontai comes clean to stay free. The jackals are gone, but she hid a wolf pup in Quarterstone to sell. She gives you a bone and begs you to take him before the pirates do. She then agrees to help the authorities.

Ahldfoet

In 2 quests, first met in On a Wing and a Prayer

Ahldfoet is a sailor on the quay, in the mood to talk. He is preparing for a voyage and wants something for the journey.

What Ahldfoet does in each quest
  1. On a Wing and a Prayer: Ahldfoet wants exactly five dusk bat wings as a lucky charm, kept secret from his superstitious crew. As a boy, trapped atop an old watchtower, he lived two weeks on three bats and ate one wing. He carries five wings on every voyage.
  2. Mummy Dearest: Ahldfoet promised a mother he met at a port to get her letter to her daughter, Wiltswys, at Camp Skull Valley. He speaks warmly of her tearful, tawny eyes and seems taken with her. He jokes that on land he is 'at sea'.

Alyrloef

In 2 quests, first met in Flowers for Aerghaemr

Alyrloef serves at Tidegate with Sergeant Roehanth. He is angry that Roehanth is missing just when they may test a new cannon.

What Alyrloef does in each quest
  1. Flowers for Aerghaemr: Alyrloef finds Roehanth's visits to the crypt morbid, since he mourns people he never knew. He jokes about hitting him with the crypt's stone hourglass, then fears he insulted Althyk, god of time. He sends flowers to make peace with the gods.
  2. Scythe Extra Large: Alyrloef does not appear. Roehanth mentions that Alyrloef set up the new cannon test, and fears he might blow himself to bits without Roehanth there.

Roehanth

In 2 quests, first met in Flowers for Aerghaemr

Roehanth is a sergeant who is missed at Tidegate. He is at the Founder's Crypt, praying at a grave.

What Roehanth does in each quest
  1. Flowers for Aerghaemr: Roehanth welcomes your flowers. At the grave of Aerghaemr, a Halfstone farmer, he tells how Aerghaemr held a trail against the Sahagin so others could flee, even giving away his boots. A former pirate, Roehanth now wants to be more like him.
  2. Scythe Extra Large: Roehanth asks you to slay the last four mantises, since he wants no deaths near Aerghaemr's grave. Then he heads back to the gate for the cannon test, worried Alyrloef might blow himself up alone. Falkbryda praises his quick thinking.

Liavinne

In 2 quests, first met in It's Probably Pirates

Liavinne is a member of a new adventuring party, waiting at the Hall of the Novice.

What Liavinne does in each quest
  1. It's Probably Pirates: Liavinne laughs at Edda for being late, saying Edda would lose a footrace to a tree slug.
  2. Fire in the Gloom: Liavinne blames Edda's slow healing for Avere's death and quits the party, admitting to never liking Edda and keeping Edda only for healing. Liavinne also begs Edda to stop carrying Avere's head around.

Paiyo Reiyo

In 2 quests, first met in It's Probably Pirates

Paiyo Reiyo is a member of the same new party, on its very first outing.

What Paiyo Reiyo does in each quest
  1. It's Probably Pirates: Paiyo Reiyo thinks searching the Sastasha caves is easy, just turning over a few rocks. To Paiyo Reiyo, this first job from the Adventurers' Guild looks like a simple road to fame and fortune.
  2. Fire in the Gloom: After Avere's death, Paiyo Reiyo angrily quits the party, calling it pathetic and saying good riddance.

E'manafa

In 2 quests, first met in It's Probably Pirates

E'manafa is a member of Dolorous Bear's party at the Drowning Wench.

What E'manafa does in each quest
  1. It's Probably Pirates: When the Sastasha job is already taken, E'manafa stays calm and tells the group it does not matter, since the wheel turns.
  2. Fire in the Gloom: E'manafa hates mausoleums (big tombs) and feels it is wrong to disturb the dead in their sleep. Kikina calls E'manafa "sister."

Kikina

In 2 quests, first met in It's Probably Pirates

Kikina is a member of Dolorous Bear's party at the Drowning Wench.

What Kikina does in each quest
  1. It's Probably Pirates: Kikina cheers on Dolorous Bear as "great leader" and promises not a wink of sleep until they reach their goal.
  2. Fire in the Gloom: Kikina cheers up a nervous E'manafa, calling her sister, and reminds her of their goal: to see their adventures become the stuff of song.

Yda

In 2 quests, first met in Into a Copper Hell

Yda greets you in Ul'dah with "Hello again!" after you help a woman in the street. This scene shows only if your journey began in Gridania.

What Yda does in each quest
  1. Into a Copper Hell: Yda cries "Case closed!" when the bully backs off, and teases that you were kind of dragged into the dodo-meat business. Yda names their order: the Scions of the Seventh Dawn, "defenders of justice." Only Momodi may know.
  2. The Scions of the Seventh Dawn: In one version of this scene, you come at the request of Yda and Papalymo, and Tataru is startled to hear their names.

Papalymo

In 2 quests, first met in Into a Copper Hell

Papalymo appears with Yda after you help a woman in the street. This scene shows only if your journey began in Gridania.

What Papalymo does in each quest
  1. Into a Copper Hell: Papalymo has watched you since you left Gridania: you served well as envoy and helped people without pay. Papalymo offers to explain your visions, mentions a friend with the same gift, and asks you to join their cause. Momodi knows where to find them.
  2. The Scions of the Seventh Dawn: In one version of this scene, you come at the request of Yda and Papalymo, and Tataru is startled to hear their names.

Thancred

In 2 quests, first met in Into a Copper Hell

Thancred greets you with "We meet again!" after you help a woman in the street. This scene shows only if your journey began in Ul'dah.

What Thancred does in each quest
  1. Into a Copper Hell: Thancred has watched you since you left Ul'dah and praises your work as envoy and your selflessness, though the rescue was a happy accident. Thancred asks about your visions, knows a woman with the same talent, and invites you to join the Scions.
  2. The Scions of the Seventh Dawn: In one version of this scene, you come at Thancred's request, and Tataru is startled to hear the name.

Also in the story

Lonwoerd

In Edelweiss, Edelweiss

Lonwoerd is the doorman of the Dutiful Sisters of the Edelweiss, a quiet "convent" near Fisherman's Bottom. Lonwoerd tells visitors without proper business to go away. He opens the Brugaire Consortium's gift of walnut bread, ginger cookies and sandwiches, and saves some for himself. He says the Sisters are always there if J'nasshym's boss needs them again.

Sweetnix Rosycheeks

In Proper Procedure

Sweetnix Rosycheeks is a goblin merchant who trades in Limsa Lominsa. He seems upset and speaks in odd, joined-up words. Sweetnix is too scared to take his monthly import papers to Mealvaan's Gate, so you carry them. He is late every month. Overjoyed by P'tahjha's kind words, he pays you. He calls himself a "beauteous gobbie", though his -ix name marks him as male.

Iron Thunder

In The Right Price

Iron Thunder is a merchant on Hawkers' Alley, one of three whose prices Swozblaet wants checked. Iron Thunder cheerfully shows off wares without a spot of rust, fresh from the forges of Naldiq & Vymelli's. You quietly write down the prices.

Kyokyoroon

In The Right Price

Kyokyoroon is a trader on Hawkers' Alley, one of three merchants whose prices Swozblaet wants checked. Kyokyoroon greets you in cheerful rhymes and speaks of himself by name. He is a Qiqirn, one of the wandering peoples, known for fitting into foreign communities.

Syneyhil

In The Right Price

Syneyhil is a merchant on Hawkers' Alley, one of three whose prices Swozblaet wants checked. Syneyhil sees you looking at everything and guesses it is "another one of those investigations". Syneyhil insists there is nothing to hide before you ask anything, so such price checks seem to be nothing new.

Baensyng

In The Right Price

Baensyng works on West Hawkers' Alley. Swozblaet says he takes the price lists and rewards the helper. Baensyng checks your list and finds nothing wrong. He explains that pirates selling stolen goods cheaply drag prices down, so these reports show at a glance when shady deals happen. He praises your work.

Faint-hearted Fighter

In It's Time to Duel

This fighter is an Auri monk on the Wolves' Den Pier. He looks tough, but his legs tremble with nerves. This fighter begs you not to hit him, thinking you want a duel. He explains the Maelstrom opened a new dueling ground on this pier, so strangers keep challenging him. He sends you to the drill sergeant and fears a "bloodthirsty Lalafell" from yesterday.

Maelstrom Drill Sergeant

In It's Time to Duel

This drill sergeant is a Maelstrom officer who runs the new dueling ground on the docks. The fighter says she has a frightful stare. This drill sergeant sees at a glance that you hunger for battle and calls you "another wolf pup". Before you fight, she offers to teach you the rules for dueling on the Wolves' Den Pier.

Klindrael

In Glory Days

Klindrael stands by the Aftcastle and knows where wild beasts gather. Klindrael is disgusted that Baderon likes aurelia umbrellas and never thought of eating such foul things. Still, she sends you to the river past the Tempest Gate, to the east, to find aureliae. Her name means "Child Doe" in Roegadyn.

R'sushmo

In A Thousand Words

R'sushmo is the Bismarck cook who made the runaway patron's meal. She is upset and is finishing a drawing of him. R'sushmo is furious: she put her heart into the grilled dodo (a bird). Like the giant in Jack and the Beanstalk, she threatens to grind his bones for bread. She cannot see why Godebert wants to question her; a picture should paint a thousand words.
Godebert

In A Thousand Words

Godebert is a Yellowjacket (city guard) at the Coral Tower. R'sushmo trusts him to deal with the runaway patron. Godebert wants justice, but says the sketch looks more like the front of a ship than a face. He asks R'sushmo to come in for questioning. He explains the Yellowjackets were once part of the Knights of the Barracuda, until the Maelstrom took them in.

N'delika

In Lost and Found

N'delika greets newly arrived travelers in Bulwark Hall, on the lower decks of Limsa Lominsa. Behind her cheerful welcome, N'delika is an undercover Yellowjacket. Most people enter through the Zephyr Drift and Bulwark Hall, so she watches everyone for suspicious types. She promises to memorize the missing names and is proud of being a good judge of character.

N'tanmo

In I Stay the Streetlight

N'tanmo is meant to fill the city's streetlamps with oil, but says the trouble with missing people keeps her at her post. N'tanmo praises you as a model adventurer, then hands you her lamp job. Sisipu reveals that N'tanmo asked her for this work, then passed it to the first adventurer she met. N'tanmo often pushes her duties onto new adventurers.

H'lahono

In A Sheepish Request

H'lahono works at the Bismarck restaurant. Guests are coming for a full-course meal, and the kitchen is short of fresh lamb. H'lahono gets the four slices of lamb just in time. She used to be a chef, but her skills were not good enough. When the Bismarck grew, she asked to be its provisioner (the one who buys supplies), and finds the role fulfilling.

Abylfarr

In A Sheepish Request

Abylfarr is a sentry (guard) stationed in Bulwark Hall, just below the Drowning Wench. Abylfarr has not eaten since his shift began and daydreams about grilled lamb. He sends you through the Zephyr Gate to the lambs. His name means 'Rage Bull' in the Roegadyn tongue; he is also the Bulwark Hall guard who turns back unregistered newcomers.

Mordyn

In Licensed to Reave

Mordyn looks for adventurers who want coin, to work for the Kraken's Arms, one of Limsa Lominsa's greatest pirate crews. Mordyn offers you paid work with the crew and sends you up the steps to the balcony to meet Carvallain, their captain. Do right by Carvallain, Mordyn says, and the captain does right by you.

Carvallain

In Licensed to Reave

Carvallain, captain of the Kraken's Arms, waits on the balcony above the Seventh Sage, a shop selling spices from the East. Carvallain is pleased with your deliveries. With the Admiral's blessing, his crew attacks and loots Garlean (imperial) ships, which he insists is legal; he hopes to grow rich this way. Born heir to an Ishgard noble house, he left that stiff world for piracy.

Lyngsath

In Licensed to Reave

Lyngsath is the head chef of the Bismarck, who gets new samples from the Seventh Sage spice shop. Lyngsath has never smelled anything like the new root, which grows in Othard. Since Othard is under imperial rule, Lyngsath wonders how Carvallain got it, but plans to cook something fresh and new with it.

Wyrkholsk

In Flour Power

Wyrkholsk is a levemete (someone who signs up adventurers for jobs) at the Red Rooster Stead. You do not meet Wyrkholsk in this quest. The chart's notes say the Stead lies close to kobold land, and kobolds sometimes raid it. That is why it hired Wyrkholsk.

K'wabati

In Bait and Swat

K'wabati waits by the southern mouth of Blind Iron Mines to show you where to set the bait for the kobolds. K'wabati is glad the Stead has not "turned chicken". She tells you to find a good hiding spot and open the crate of meat nearby. She says the kobolds follow their noses and see you too late.

R'jumani

In What Goes Around

R'jumani is one of the millers who work at the Grey Fleet. R'jumani is annoyed by your questions: the mill is spinning, so what more is there to know? R'jumani's only problem is you meddling in the chores, and sends you away.

Eshushu

In What Goes Around

Eshushu is one of the millers who work at the Grey Fleet. Eshushu has noticed nothing wrong, but takes a look and finds a small nick in the sail, nothing urgent. Eshushu says the mills are built from old ships' wood, and their sail cloth comes from the war fleet's masts, made for strong wind.

Waentzirn

In What Goes Around

Waentzirn is one of the millers who work at the Grey Fleet. Waentzirn scoffs that the mill is fine. Waentzirn thinks the real worry is the "grubby scavengers" who rob the millers of their yield.

O'kalkaya

In Soothing the Savage Siren

O'kalkaya has advice for adventurers headed into the Missing Member, a drinking spot run by Captain Rhoswen, leader of the Sanguine Sirens. O'kalkaya tells you to kneel to the captain, who is in a foul mood and bad with customers. After your visit, O'kalkaya hears her cackle and thanks you: her rages cost the crew deckhands. O'kalkaya trusts Rhoswen to work within the Admiral's rules.
Chartain

In Moegramm Had a Little Lamb

Chartain is a shepherd. Moegramm says Chartain should know how to make his sheep shine again. Chartain blames the dull wool on lice, and the lice on too few farmhands to brush the sheep. Chartain cannot keep up alone and asks you to comb three shaggy sheep. Chartain boasts that La Noscean sheep are famous for soft white wool.

X'payan

In Much Ado About Dodos

X'payan works with the dodos at the Red Rooster Stead. Moegramm sends you to her to help bring back the birds that escaped from the pen. X'payan is glad of your help and makes bird puns. She gives you sacks to catch the three runaway dodos while she repairs the fence. The X in her name, said like 'She', shows her tribe: the Lynx, among the Seekers of the Sun.

Ahctkoen

In Where the Heart Is (Mist)

Ahctkoen is a citizen of Limsa Lominsa who dreams of owning a home. He has heard that plots of land in Mist, a residential area, are up for auction. Ahctkoen hears from you that only adventurers may buy plots in Mist, to draw them to Limsa Lominsa. He is disappointed, but understands the city needs adventurers in these hard times. He puts his dream of a home on hold and stays hopeful.

Roeganlona

In Where the Heart Is (Mist)

Roeganlona is a Maelstrom representative posted outside the gates to Mist in lower La Noscea. She can confirm or deny the rumored land auctions. Roeganlona confirms the Admiral's order: Mist's plots are sold only to adventurers, to bring them to Limsa Lominsa. The city needs brave fighters, and owning a home gives them more reason to help. She urges you to see Mist yourself.

Wauter

In Washed Up

Wauter is one of the ex-pirate farmhands at Summerford Farms, skipping work with a mug in hand. Wauter says hands busy lifting a mug cannot work, and bets you cannot guess the drink. It is swill. Wauter agrees to do Staelwyrn's chores if that earns a taste of proper grog.

Ossine

In Double Dealing

Ossine works at the La Thagran Checkpoint and is waiting for a scheduled sack of oranges from Summerford Farms. Ossine is surprised the oranges arrive on time, with none missing, for once. His reaction shows Sevrin has tried this before. Glad the usual bagmen are gone, he gives you Staelwyrn's full payment to deliver.

Khanmhar

In A Pound of Cure

Khanmhar knows that hi-potions, strong healing drinks, are running short at Tiller's Rest, and hopes to fix that. Khanmhar says the ex-pirates have been away from the sea too long and turn to fighting to ease their broken hearts. A full supply of medicine barely lasts a week, so Khanmhar asks you to buy a hi-potion for Wydaloef.

W'dhovaka

In Out to Dry

W'dhovaka is a Skylift operator. Megalocrabs have ripped the leather balloon envelopes she left drying on the rocks. W'dhovaka swears by Llymlaen, Limsa's guardian goddess of navigation, and has to explain the ripped leather is not her trousers. Fewer balloons mean less cargo lifted. After you kill five crabs, she wants a more lasting fix, as loads keep growing.

Doesrael

In A Bridge Too Full

Captain Doesrael watches over Oschon's Embrace, the only bridge joining the Drydocks road to Limsa Lominsa. Today it is jammed with wagons. Doesrael is annoyed that the guard Wyrstmaga has left his post, and sends you to fetch him. Once Wyrstmaga is back, Doesrael praises your silver tongue but calls Wyrstmaga a delicate flower who must harden up. His name means "Two Doe" in old Roegadyn.
Fraeloef

In Relighting the Torch

Fraeloef is a Yellowjacket guard on duty at Swiftperch. He sees that the Brewer's Beacon lighthouse shines too weakly to guide ships, but he cannot leave his post. Fraeloef sends you to check on Khanswys, the lighthouse keeper. When he hears the furnace is damaged, he writes reports and sends you to Forgemaster H'naanza in Limsa Lominsa for quick repairs. His name means "Free Leaf" in old Roegadyn.

Khanswys

In Relighting the Torch

Khanswys is the keeper of the Brewer's Beacon, the lighthouse that guides ships in the bay. Its light has grown dangerously dim. The bomb, a fiery monster, that fuels Khanswys's furnace has escaped. She sends you to lure it with a fire and bring back its claw. That keeps the beacon going, but she finds the furnace broken and wants a real smith. She swears by Llymlaen.

Wafufu

In Failure to Lunch

Wafufu runs a food cart at the Moraby Drydocks. Four of her packed lunches have gone missing, and the workers are hungry. Wafufu gets very anxious. She must stay with her cart, so you search for the lunches. She fears the hungry foreman Ahtbyrm might eat her, and is relieved when all four return. The journal says this would almost surely never have happened.

Lyngstyrm

In Failure to Lunch

Lyngstyrm is a worker at the Moraby Drydocks. You meet him while searching for Wafufu's lost lunches. Lyngstyrm took a lunch knowing it was not his, since it is his day off. He gives it back and asks you not to tell Wafufu, so she does not think he tried to cheat her. His name means "Long Storm" in old Roegadyn.

Maetimynd

In Failure to Lunch

Maetimynd is an armorer at the Moraby Drydocks who pounds and shapes iron sheets all day. You meet him while searching for Wafufu's lost lunches. Maetimynd has one of Wafufu's lunches and had started to think she liked him. He says she is not his type: he likes taller, heavier, bluer women. He gives the meal back. His name means "Mighty Mouth" in old Roegadyn.

Yulgi Honalgi

In What Counts

Yulgi Honalgi is the yardmaster, in charge of the yard, at the Moraby Drydocks. With the Victory nearly finished, he needs a final count of the lumber left. Yulgi Honalgi teases you about your counting skills. The numbers you bring are grim. He says they are still far from healing after the Calamity, a disaster five years ago. As a proud Lominsan, he hates to say they may need wood from Gridania.

Ruimo Falaimo

In What Counts

Ruimo Falaimo is a worker at the Moraby Drydocks. Yardmaster Yulgi Honalgi has set Ruimo Falaimo to counting the lumber. Ruimo Falaimo counted the two hundred oak planks five times, to be sure, but warns it may not be enough. The Calamity's fires burned most trees in Oakwood, a forest, and the rest were cut down for the Victory.

Hezzkhezl

In Nailed It

Hezzkhezl is a shipwright of Naldiq & Vymelli's who drives rivets, metal pins joining steel plates, on the Victory. He boasts no one rivets better. Hezzkhezl heats rivets with the white-hot cores of lightning sprites, a kind of monster, and needs more. Delighted when you bring three, he can head to the alehouse. He credits foreman Ahtbyrm with the idea. His name means "Hot Kettle" in old Roegadyn.

A'zumyn

In Forbidden Island

A'zumyn, a field assessor for Mealvaan's Gate (the custom house), looks into banned goods from abroad. Candlekeep Quay residents report an unknown pest. A'zumyn wants the foreign pest destroyed before it breeds and harms local animals. The pests are Thavnairian mites, seen before only in Radz-at-Han cargo reaching Limsa Lominsa. A'zumyn suspects pirates smuggled them in, and wants to dig deeper. The name's 'A' marks the Antelope tribe.

Mimidoa

In Constant Carvings

Mimidoa is a veteran shipwright of Naldiq & Vymelli's at the Moraby Drydocks. Gout, a painful illness, keeps him from visiting a friend at a lighthouse. Mimidoa is very forgetful: he cannot recall Rostnzeh's name and does not recognize you when you return. He once served on the Cloud Dancer, and was a cannonboy for Captain Mistbeard. He thinks women's company would cure Rostnzeh's loneliness, and plans to send some.

Urswyrst

In Victory in Peril

Urswyrst is a guard at the front gate of the Moraby Drydocks, one of Ghimthota's watch. Urswyrst reports seeing an unsavory man slinking along the bluff near Empty Heart, and asks you to go up and take a look. You may speak with Urswyrst or with C'nangho; both point you there.

Shifty-eyed Sailor

In Victory in Peril

This shifty-eyed sailor is the suspicious man the guards spotted on the cliff at Empty Heart. When you confront this sailor, he scoffs that you are too late: "what's to happen is already happening." His words chill you. Ghimthota takes him for one of the pirates. Right after, pirates with explosives strike the shipyard.

Zanthael

In A Mizzenmast Repast

Zanthael is in Bulwark Hall, waiting to lead the banquet's guest of honor to the briefing room. Zanthael is annoyed that Baderon described you only by your "fancy dress shoes." Once he sees them, he leads you to the briefing room. Afterward he announces you to the Admiral in the command room and suggests a brisk walk by the smelly waterfront.

Preoccupied Porter

In Good for What Ales You

This porter works at Fisherman's Bottom, busy with the cargo. This porter thinks Dodozan "ain't a bad sort" for a trader. The porter saw a drunk asking whether the cask held ale, a man who reeked of rum and vomit and was clearly no working man.

Affable Angler

In Good for What Ales You

This friendly angler is fishing at Fisherman's Bottom. This angler saw a big man carrying a cask, who asked for smoked fish to go with ale. He wore black, the mark of the Bloody Executioners, so the angler warns you to leave it alone.

Lionnellais

In The Lominsan Envoy

Lionnellais works the Highwind Skyways counter for flights to Ul'dah, at the airship landing in Gridania. Lionnellais recognizes you as the Lominsan envoy, calls it an honor to serve you, and readies your flight to Ul'dah.

Airship Attendant

In The Lominsan Envoy

This airship attendant calls passengers at the airship landing. This attendant announces that the airship bound for Gridania is about to leave and asks passengers to go to the boarding gate.

Silent Conjurer

In The Lominsan Envoy

This conjurer stands at Nophica's Altar in Gridania, admitting visitors to the Lotus Stand. This conjurer asks to inspect your letter, confirms the seal of the Admiral of Limsa Lominsa, and leads you to the Elder Seedseer.

Eline Roaille

In The Lominsan Envoy

Eline Roaille is with Raubahn in Ul'dah when you arrive. Eline Roaille adds that the Garlean emperor is eighty, failing in health and without a clear heir, which may explain the Empire's quiet. Eline offers to inform the sultana and the Syndicate, but Raubahn prefers to tell Her Grace himself.

Nero tol Scaeva

In The Lominsan Envoy

Nero tol Scaeva is someone on the Garlean Empire's side whom you have never met. Nero appears among the imperials in a scene alongside Gaius van Baelsar, and mumbles about someone called "Garlond."

Cid nan Garlond

In The Lominsan Envoy

Cid nan Garlond is someone you have never met. Cid nan Garlond is the "Garlond" whom Nero mumbles about in the imperial scene. Highwind Skyways, the airline you fly with, grew up with Cid.

Solus zos Galvus

In The Lominsan Envoy

Solus zos Galvus is the emperor of the Garleans, known to you only by name. Raubahn says that fifty years ago, Solus led the Garleans as legatus, conquered the other nations of Ilsabard, and made his republic an empire. Eline Roaille adds that he is now eighty, in failing health, with no clear heir.

Midgardsormr

In The Lominsan Envoy

Midgardsormr is a great dragon you have never seen. In a scene among the imperials, Gaius van Baelsar recalls a countless army of dragons meeting the imperial fleet, with the great Midgardsormr flying at its center.

Starved Pup

In Man's Best Fiend

This wolf pup is hidden in Quarterstone, weak with hunger. He growls at anyone who comes near. The pup gulps the bone but stays wary until you rub his belly. Then he trusts you and follows you. With no room at headquarters, Skribyld leaves him in your care. His pet entry says he was bred as a Garlean war wolf.

Catguistl

In I Hereby Relieve You

Chief Sergeant Catguistl is the officer in charge at the Sastasha Seagrot, a cave. You find him standing outside it, not inside. He warns you the cave is a deadly maze and says only willpower kept him alive. He gladly hands the job to you and heads back to Skull Valley. He calls the cave "labyrinthine" (like a maze) four times in one talk.

Sthalrhet

In My Brother's Not a Keeper

Captain Sthalrhet commands South Tidegate, the gate that guards the narrow channel south of Camp Skull Valley. He takes the wine as a sign that Wiltswys is sweet on him, and talks about her in a bold, flirty way. He boasts that women always liked him. He mentions his brother, the captain of North Tidegate.

Nortmoen

In My Brother's Not a Keeper

Captain Nortmoen commands North Tidegate, the gate on the northern channel of Camp Skull Valley. He has no time for idlers. He calls Wiltswys mousy but praises her taste in wine. When he hears his brother Sthalrhet got a bottle too, he gets jealous. He insists her gift is only professional, and vows to keep his brother away from "that lovely girl."

Flustered Man

In Beauty Is Only Scalp Deep

This flustered man stands in the street near a frightened woman. He cries that no one listens and that he must have his blades. This man says he is a famous artist, and that his tools, "the extensions of my very soul," were taken from him. Weak and faint, he gives you three names to visit for help, then gives his own name: Jandelaine.

Disgruntled Madam

In Beauty Is Only Scalp Deep

This upset woman in Limsa Lominsa points at a man and cries that he is the Slasher. This woman saved for six moons, giving up shoes and even food, to be styled by a famous aesthetician (a hair and beauty artist). She demands you punish the man. Once he does her hair, she feels reborn and begs for another appointment.

Jandelaine

In Beauty Is Only Scalp Deep

Jandelaine is the man accused of being the Slasher. He says he is famous, but chokes before he can finish saying what he is. The guildmasters' parcels hold his tools, and he springs back to life. He is the aesthetician, a famous hair artist, and he remakes the madam's look. To thank you, he offers to come whenever you ring the crystal bell in an inn room.

Beatin

In Beauty Is Only Scalp Deep

Beatin is the guildmaster of the Carpenters' Guild in Gridania. Beatin sighs that Jandelaine has lost another tool, while wood and supplies are short. Beatin respects his skill but not his temper. Still, Beatin gives you a package for him and hopes he mends his ways.

Severian

In Beauty Is Only Scalp Deep

Severian is a guildmaster at the Alchemists' Guild in Ul'dah. Severian made Jandelaine a fresh batch of special creations just last week, and is not surprised to hear they were stolen. Severian calls Jandelaine a misunderstood genius, just like Severian, and orders you to rush a new parcel to him.

I'tolwann

In Rising to the Challenge

I'tolwann works at the Wench, a tavern. She is fed up with drinkers who leave their things behind. She found a well-worn journal left by a first-time customer, a stranger who loved his drink. She sends you to the regular Quentenain, who drank with him. She would offer you a free drink, but Baderon docked her wages last time.

Quentenain

In Rising to the Challenge

Quentenain is a regular at the Wench who spends more nights there than in his own home. He remembers the journal's owner well: the man drank twenty flagons, passed out, and left Quentenain to pay. Still angry, he tells you the man was heading for Aleport and may be stuck at the ferry docks.

V'mellpa

In It's Probably Pirates

V'mellpa works at the ferry docks on the lower decks. Commodore Reyner sends you to her for directions. She tells you to take a ferry to Aleport, then visit the Hall of the Novice, where the Adventurers' Guild trains newcomers, before entering Sastasha. She warns you to expect pirates. A chart note says her lines changed when the Hall was added.

Seasoned Adventurer

In It's Probably Pirates

This seasoned adventurer works at the Hall of the Novice, north of Aleport, and has heard you are going to Sastasha. This adventurer warns that the cave's dwellers are many and bloodthirsty, so going alone is foolish. You need companions and group-combat training. The Smith there sets the training, and the Yellowjacket scout at the cave has your orders.

Lewin

In Fire in the Gloom

Lewin, the Bowlord, leads the men and women of the Gods' Quiver. He comes to the Carline Canopy, urgently seeking help. He fears the Lambs of Dalamud, a doomsday cult, are in the Deepcroft. The Calamity thinned his ranks and the Ixal (birdmen) keep attacking, so he asks you. A chart note says his bride vanished after their wedding and was found speared by the Ixal.

Gods' Quiver Bow

In Fire in the Gloom

This Gods' Quiver Bow is one of Lewin's soldiers, posted at the entrance to the Tam–Tara Deepcroft. This guard explains that the Lambs of Dalamud worshipped the lesser moon, Dalamud. When it exploded in the Calamity, they blamed everyone else and swore revenge. He asks you to stop them from defiling the Deepcroft, for the sake of the dead and Gridania.

Papashan

In Into a Copper Hell

Papashan, formerly of the Sultansworn, arrives at the Quicksand hot from the sun. He brings a request for help at Copperbell Mines. He explains that the hecatoncheires, giants enslaved and then buried in the mines long ago, have broken free and stopped all mining. He begs you to subdue them. A chart note says he guarded young Nanamo when she took the throne, like a second father.

Painted Mesa

In Into a Copper Hell

Painted Mesa works for Amajina & Sons Mineral Concern and knows Copperbell Mines well. He is at the Quicksand. He explains the very old mines were reopened only because rebuilding after the Calamity needs materials. The miners knew of the giants but thought none survived. After you clear the mines, he thanks you: Ul'dah can rebuild, and the nation owes you.

Stone Torch

In Into a Copper Hell

This Stone Torch guards the entrance to Copperbell Mines and tells people to stay away. This guard is surprised Papashan found a volunteer so fast. The giants may try to come outside, so the guard urges you to go in quickly. The Stone Torches keep watch at the entrance in case any slip past you.

Ungust

In Into a Copper Hell

Ungust is a merchant in the streets of Ul'dah. The game shows him only as the Obnoxious Merchant. He accuses a poor refugee woman of stealing dodo meat and sneers at refugees. He offers to spare her if she serves him "in whatever capacity" he wants. He sets his bodyguards on you. When witnesses say she bought it, he backs down.

Nanamo Ul Namo

In Into a Copper Hell

Nanamo Ul Namo does not appear in this quest. A chart note names her as a young sultana. A chart note says Papashan guarded Nanamo when she came to the throne. She had no family left, and he became like a second father to her.

Troubled adventurer

In An Ill-conceived Venture

This troubled adventurer has lost his retainer (a hired helper), who went on a venture (a trip to gather items) in Skull Valley. This adventurer sent his retainer out with poor gear and fears he was eaten. He asks you to tell the local watch if you find remains. The retainer is alive, calls him an oaf, and makes him buy the first round.

Tataru

In The Scions of the Seventh Dawn

Tataru sings to herself at the entrance of the Waking Sands, the Scions' headquarters. Startled, she first takes you for a shady merchant or a pushy peddler, then welcomes you warmly and tells the Antecedent, Minfilia. She brings Minfilia papers. A chart note says she is twenty-one, a beginner singer, and sings while doing her sums.

Scion of the Seventh Dawn

In The Scions of the Seventh Dawn

This Scion of the Seventh Dawn stands inside the Waking Sands, guarding the way. This Scion tells you Lady Minfilia has eagerly awaited your coming, and shows you the way.

Minfilia

In The Scions of the Seventh Dawn

Minfilia, called the Antecedent, leads the Scions of the Seventh Dawn. She waits for you in the solar, a room in the Waking Sands. She welcomes you home after five years, as Louisoix said. The Scions protect Eorzea from the primals, godlike beings. Your power, the Echo, shows people's pasts and lets you understand any speech. She has it too, asks your help, and shares the password "wild rose."

Aulie

In The Scions of the Seventh Dawn

Aulie is someone you can chat with inside the Waking Sands. A chart note says that in an optional chat, Aulie is amazed at how small Tataru writes the names in her list. Aulie could not read a single one.

Memeroon

In Grimoire Fandango

Memeroon is the owner of Memeroon's Trading Post in upper La Noscea, where the guildmaster was spotted. Memeroon owns the trading post that bears his name. When you dance for him, he cheers in simple, broken words about a funny Miqo'te dance and asks if you dance too. K'rhid Tia is watching the whole show.

Rhylzirn

In Sinking Doesmaga

Rhylzirn is a gruff fisherman in Costa del Sol, in eastern La Noscea, with his hands full of fishing. Rhylzirn expects you. He takes K'lyhia's list and hands you a fresh herring for the cook Opylona. That list also calls in the Yellowjackets, and at the end Rhylzirn blocks Doesmaga's escape, saying they brought shackles for him.

Opylona

In Sinking Doesmaga

Opylona is the cook for Master Gegeruju, who is expecting his meal at any moment. Opylona is happy with the herring, since her master likes broiled fish and she hopes for extra coins. She gives you a homemade eel pie and passes on your arcanist colleague's order: take it to Master Gegeruju, do not eat it.

Gegeruju

In Sinking Doesmaga

Master Gegeruju is Opylona's master, at his home in Costa del Sol, waiting for his meal. Gegeruju speaks in long, fancy words and loves eel pie. He pays you a heavy purse of gil (money) for it. He is a rich, powerful Dunesfolk Lalafell, and how he got his money is a mystery.

P'ebaloh

In Sinking Doesmaga

P'ebaloh is at Master Gegeruju's home in Costa del Sol, holding a message for someone. A Mealvaan's Gate assessor, K'lyhia, asked P'ebaloh to pass a message to whoever brings Master Gegeruju an eel pie. P'ebaloh hands it to you: give the purse to the dancer Ealdgyth.

Ealdgyth

In Sinking Doesmaga

Ealdgyth is a dancer who asks to see your coin first. She has three children to feed and no time to chat. Ealdgyth is thrilled with the heavy purse; her children can eat well this week. She was told to expect you, and gives you a leather satchel from K'lyhia and her own pareo, a colorful cotton undergarment she wore for countless summers, for Drogo.

Drogo

In Sinking Doesmaga

Drogo is a warehouse foreman, rushing to finish his work before his master gets angry. Drogo can hardly believe his luck at getting Ealdgyth's pareo, which he treasures. As K'lyhia arranged, he gives you a bottle of vintage wine for the sailors at the Flying Shark, and warns you they are mean cutthroats.